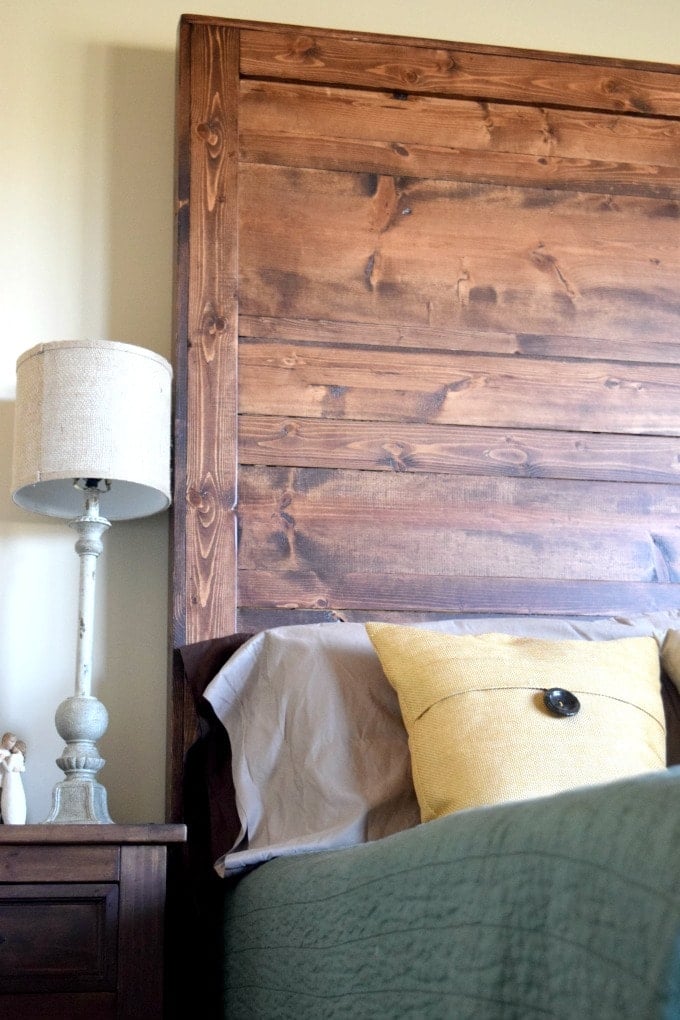
How to Create Your Own Rustic Headboard
As David and I were going through the process of building our house, we loved shopping for traditional pieces as well as furniture and accessories that we could use to furnish and decorate our home once it was complete. While we scored some incredible bargains (actually finding some of our favorite pieces on Craig’s List), there were a few specific items that we struggled to find – the perfect rustic headboard being one of those things.
I would describe our taste as a mix of mission style and farmhouse chic, but for some reason, we simply could not seem to find a headboard that spoke to us. After months of shopping around, we thought, “Why don’t we just make our own rustic headboard?” By we I mean my hubby as he is the talented woodworker in the family.

Get our THIS LITTLE HOME OF MINE nEWSLETTER
Delivered directly to your inbox!
This post includes all of the info you will need to be able to create your own rustic headboard – a statement piece that I guarantee will become the focal point of any bedroom.
How We Created Our Own Rustic Headboard
While browsing Pinterest, we came across a gorgeous headboard designed/created by Ana White, and we agreed that it was absolutely perfect – exactly what we had been looking for…for months! We knew we were going to need to make a few adjustments of our own (in order for the project to work in our specific space), but after spotting her super simple Reclaimed Wood Headboard project, we knew that our rustic headboard would soon become a reality!
For some reason, my hubby tends to think I am a tad picky. Okay, I’ll admit it – I am slightly picky…okay, a lot picky. Anyway, he went to great lengths to make sure that I was going to definitely love the headboard BEFORE he dove in to the project. I was absolutely in love with the style and excited to see the piece added to our master bedroom.
Ana White’s plan includes step-by-step instructions that will guide you through making a queen-size headboard, and while we loved the style, we were in need of a king-size headboard; So hubby began by taking measurements of our metal bed frame and adjusting the plan accordingly. We also knew that we wanted our headboard to reach higher up toward our bedroom ceiling. So hubby considered that as well when he was deciding how much wood needed to be purchased.
I love that Ana White includes a shopping list as well as a list of tools that will be needed to complete the project.
We were able to purchase everything we needed from Lowe’s. At that point in our life, we were visiting Lowe’s 2-3 times a day. I wish I was exaggerating. I am not.
- Southern Yellow Pine was our choice of wood.
- Rustoleum’s American Walnut was the perfect stain color for us! We love this look, but you may choose to paint yours.
- We finished the project by using Rustoleum’s matte-finish polyurethane.
Ana White’s plan states that the project can be completed for $20-$50. We spent closer to $100 on our materials, but we did create a much larger version of her project. It also took us much longer than stated to complete the headboard. But once again, that may be [in part] because we were working with a much larger piece than the original design shows.
David was very much relieved when he saw how happy I was with the finished project. It turned out to be more beautiful than I imagined.

Disclaimer: A headboard of this size will require three of your husband’s most muscular friends to come over and assist in transporting the piece from the garage to the master bedroom. Be sure to offer them a slice or two of pizza. They will have more than earned it.
If you love this headboard, you’d probably also like to hop over here and see the farmhouse table David built – again, using plans from Ana White!


